 Installation Guide | Standard, Standard Plus, & Forward L Brackets
- Measure and mark the appropriate mounting locations on the cap of your knee wall. Start at 6” in from the edges and space remaining brackets 18” – 24” apart.
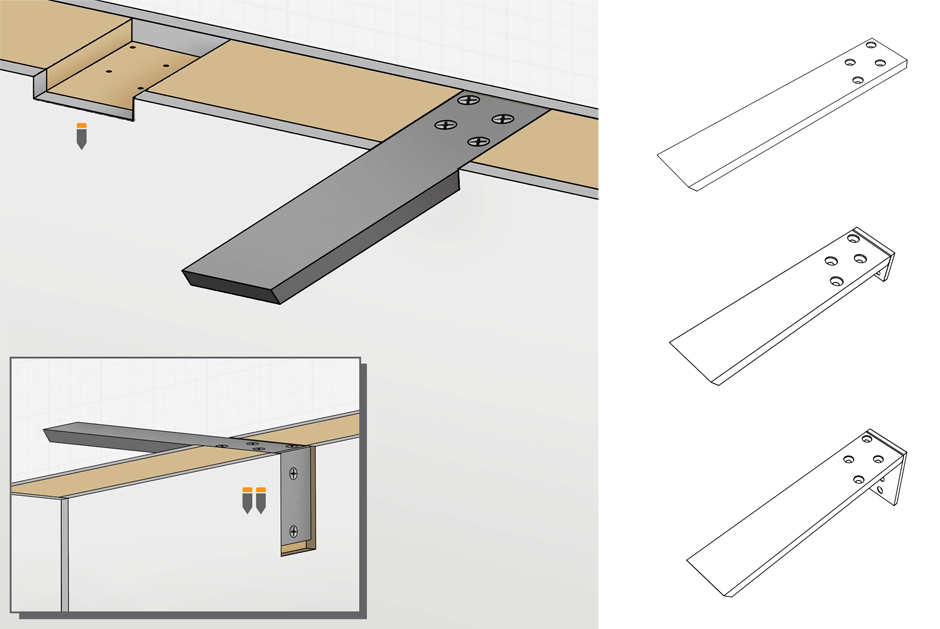
- Create mounting channel for bracket:
- POWER TOOLS: Use a Top Bearing Flush Trim router with a ½” deep cutting length and trim the excess wood out of the mounting surface.
- MANUAL TOOLS: Use a hand saw and cut along each line to a depth of ½”. Then using a wood chisel (1” is a good choice) remove the excess wood between the lines you just created.
Be sure to remove all the material in the mounting channel so you have a clean, level channel for the bracket to be seated in. If installing Standard Plus or Forward L brackets chamfer the back side to accommodate the weld bead.
- Place the bracket into the mounting channel and affix the bracket to the cap using ALL of the included #12 wood screws.
-
 HINT: Pre-drill holes using a 9/64” bit. This will help ensure the wood doesn’t split.
 - Use a level to ensure the brackets are level with the knee wall. If necessary, use shims to make the bracket level.
- Prior to setting the top in place, run a bead of high-quality silicone adhesive down the center of each bracket.
 ADDITIONAL STEP FOR STANDARD PLUS AND FORWARD L BRACKETS:
Screw the flange to the backside cap of the knee wall. The Forward L flange will screw into both the back side of the cap and the vertical stud.