 Installation Guide | Foating Wall Mount Bracket
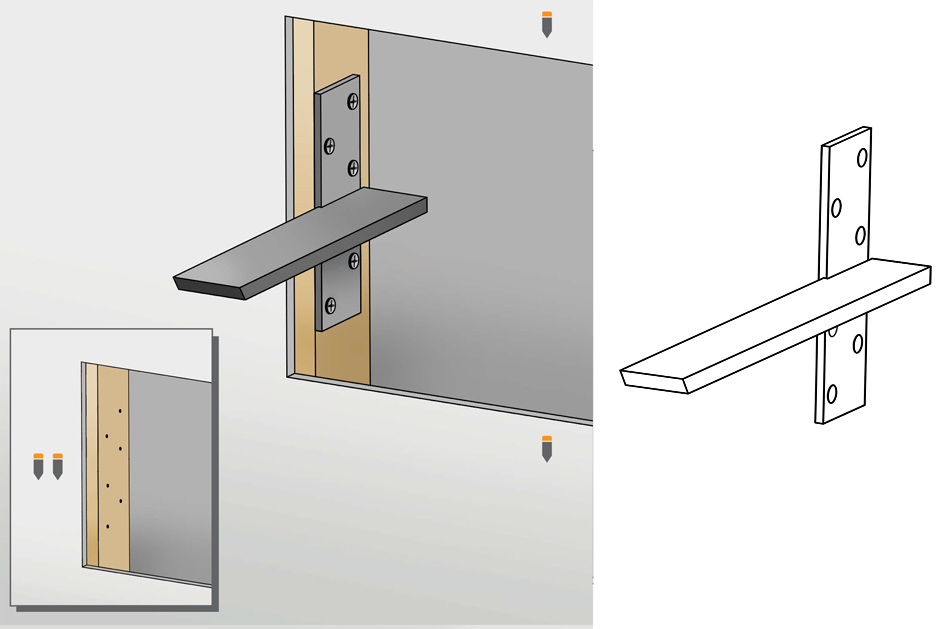
- Measure and mark the appropriate mounting locations on your wall.
- Remove sheet rock in the area of the stud where the bracket will be mounted.
 HINT: Use a chalk line to pop a straight, level line. Then attach a 2” x 4” along the line ensuring it stays level and straight. This will serve as a platform for your brackets, keeping them level with each other.
- Securely mount the bracket to the side of the stud, using the ¼” lag screws provided.
 HINT: Pre-drill holes using a 7/32” bit. This will help ensure the wood does not split.
- Once the bracket is fastened, patch the wall with a quick-patch kit.
- Prior to setting the top in place, run a bead of high-quality silicone adhesive down the center of each bracket.